How to Knit a Scarf: A Simple Beginner Method That Actually Works
Learn how to choose yarn, pick the right needles, cast on, knit clean rows, fix common mistakes, finish the edges, and make a scarf you will actually want to wear.

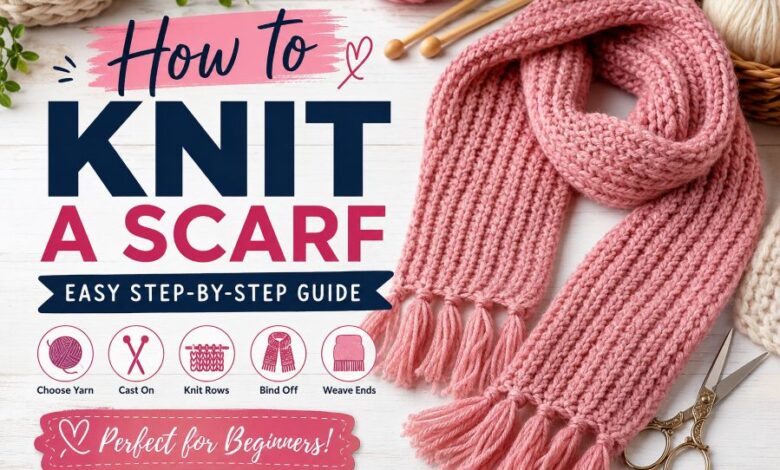
Learning how to knit a scarf sounds simple.
And honestly, it can be.
You do not need ten stitch patterns. You do not need expensive tools. You certainly do not need to understand sweaters, sleeves, shaping, or complicated charts before getting started.
A scarf is basically a long knitted rectangle.
That simplicity matters.
It gives a new knitter room to work slowly, get used to holding yarn, learn how tension feels, make a few ugly rows, fix them, and keep going. By the time the scarf reaches full length, your hands usually know far more than they did during those first ten minutes.
Still, there are a few things worth getting right from the start.
The yarn matters. Needle size matters. Your stitch choice matters too.
Here is how to put everything together.
Quick Facts
A basic scarf can be made with only three main knitting skills: casting on, making the knit stitch, and binding off. For a first project, garter stitch is one of the easiest choices because you simply knit every row.
| INformation | Details |
|---|---|
| Best beginner stitch | Garter stitch |
| Basic method | Knit every stitch on every row |
| Good beginner yarn | Worsted or chunky yarn |
| Common scarf width | About 6–9 inches |
| Common scarf length | About 55–70 inches |
| Main tools | Yarn, knitting needles, scissors, tapestry needle |
| Gauge importance | Helps control width, drape, and yarn use |
| Easy needle choice | Use the size recommended on the yarn label |
| Common beginner issue | Accidental extra or dropped stitches |
| Finishing steps | Bind off, weave in ends, and block if suitable |
What Do You Need to Knit a Scarf?
Your first knitting setup can stay very small.
You mainly need:
- Yarn
- Knitting needles
- Scissors
- A yarn or tapestry needle
- Measuring tape
That is enough.
A crochet hook can also be handy if you drop a stitch, though it is not required.
Blocking mats and pins are useful later. Again, optional.
Do not feel pressured to buy a huge knitting kit before you know whether you enjoy the craft.
Start basic.
Pick the Right Yarn First
Yarn can make your first scarf easy or surprisingly annoying.
Some yarn looks beautiful in the ball but becomes tough to work with once you start knitting.
Very fuzzy yarn can hide stitches.
Very thin yarn takes longer.
Dark yarn can make individual loops hard to see, especially under poor lighting.
For a first scarf, a smooth yarn usually works better.
Good beginner yarn choices
Try one of these:
- Medium or worsted-weight yarn
- Chunky yarn
- Wool and acrylic blends
- Acrylic yarn
- Soft wool
- Merino wool
Medium yarn is a safe starting point.
Chunky yarn is faster.
You can see the stitches clearly, the scarf grows quickly, and mistakes tend to stand out before they travel too far down the work.
That can save a lot of frustration.
Understanding Yarn Weight
Yarn comes in different thicknesses.
You may see numbers printed on the label.
A common system runs from very fine yarn up to jumbo yarn.
Here is a simple reference:
| Yarn Weight | Common Name | Common Needle Range |
|---|---|---|
| 1 | Fingering | 2.25–3.25 mm |
| 2 | Sport | 3.25–3.75 mm |
| 3 | DK | 3.75–4.5 mm |
| 4 | Worsted / Aran | 4.5–5.5 mm |
| 5 | Bulky / Chunky | 5.5–8 mm |
| 6 | Super Bulky | 8–12.75 mm |
| 7 | Jumbo | 12.75 mm and above |
These sizes are general ranges.
Check the yarn label.
Most yarn labels tell you the needle size the maker recommends.
That gives you an easy place to start.
What Yarn Is Best for a Scarf?
That depends on the scarf you want.
Wool
Warm. Classic. Springy.
Wool works well for cold-weather scarves and keeps heat close to the body.
Some wool feels rough against sensitive skin, though.
Check before buying.
Merino wool
Merino tends to feel softer than many traditional wool yarns.
It works well around the neck.
That makes it a popular scarf choice.
Acrylic
Cheap, easy to find, and often simple to wash.
Acrylic is a smart beginner choice if you want to practice without spending much money.
Quality varies a lot.
Feel the yarn first if possible.
Cotton
Cotton creates a cooler scarf.
It can work well for lighter accessories, though it tends to behave differently from springy wool.
Alpaca
Soft and warm.
Alpaca can also create more drape.
It feels great, but beginners may find some alpaca yarn slightly slippery.
Blended yarn
Blends combine fibers.
A wool-acrylic mix, for example, may give you some wool warmth while keeping care fairly simple.
For everyday knitting, blends can be a very practical choice.
What Knitting Needles Should You Use?
You can knit a scarf on straight needles.
That is the classic setup.
Circular needles also work.
Yep. Even for a flat scarf.
With circular needles, you knit across one row, turn the work, then knit back. You do not join the stitches into a circle.
Circular needles can feel more comfortable once a scarf becomes heavy because much of the fabric sits on the cable instead of hanging from the needle ends.
For a first narrow scarf, straight needles are perfectly fine.
How Wide Should a Scarf Be?
There is no fixed scarf width.
You decide.
A narrow scarf may be around 4 to 6 inches wide.
A standard everyday scarf often sits around 6 to 9 inches.
A wider scarf may reach 9 to 12 inches.
Wrap-style designs can go much wider.
Here is a simple size chart.
| Scarf Style | Approximate Width | Approximate Length |
|---|---|---|
| Skinny scarf | 4–6 inches | 55–70 inches |
| Standard scarf | 6–9 inches | 55–70 inches |
| Wide scarf | 9–12 inches | 60–75 inches |
| Wrap-style scarf | 15 inches or more | 65–75 inches or more |
These are common ranges.
Nothing says your scarf must follow them exactly.
Want it shorter?
Make it shorter.
Want a big winter scarf?
Go wider.
That freedom is part of the fun.
How Many Stitches Do You Cast On for a Scarf?
This is where beginners often get confused.
You will sometimes see advice such as:
“Cast on 25 stitches.”
That can work for one yarn and needle combination.
Change the yarn, though, and 25 stitches might produce something much wider or narrower.
A better method uses gauge.
The basic formula
Use:
Desired scarf width × stitches per inch = number of cast-on stitches
Say your knitting gives you 18 stitches across 4 inches.
18 ÷ 4 = 4.5 stitches per inch.
You want a 7-inch scarf.
7 × 4.5 = 31.5 stitches.
Round that to about 32 stitches.
Now you have a cast-on number based on your actual knitting.
Much better.
What Is Knitting Gauge?
Gauge tells you how many stitches and rows fit into a set measurement.
Most patterns measure gauge across 4 inches or 10 cm.
Your tension changes gauge.
So does yarn.
So does needle size.
Two people can use the same yarn and needles yet get slightly different results.
One person knits tightly.
Another knits loose.
That is normal.
For a scarf, gauge does not need to be as exact as it would for a fitted sweater.
But it still changes:
- Scarf width
- Fabric thickness
- Drape
- Yarn use
- Finished feel
A quick swatch can save you from discovering 20 inches into the project that your “normal scarf” is turning into a narrow belt.
The Easiest Stitch for a Beginner Scarf
Use garter stitch.
It is simple.
When knitting flat, garter stitch means:
Knit every stitch on every row.
That is it.
No alternating rows.
No stitch chart.
No complicated repeat.
Garter stitch creates visible horizontal ridges and looks similar on both sides.
It also tends to stay flat.
That last point is useful.
Very useful.
How to Knit a Scarf for Beginners
Now we get to the actual knitting.
Step 1: Make a Slip Knot
Create a loop of yarn and place it on your needle.
The slip knot becomes your first starting loop.
Do not pull it painfully tight.
You want it secure but still able to move along the needle.
Step 2: Cast On Your Stitches
Casting on creates the first row of loops.
Long-tail cast-on is a common choice.
Knitted cast-on also works.
Beginners sometimes pull each cast-on stitch very tight because they worry the yarn will fall off.
Try not to.
A tight cast-on makes the first edge stiff and can pull the scarf inward.
Keep the loops neat but movable.
Step 3: Hold the Needles
Place the needle carrying your stitches in your left hand.
Hold the empty needle in your right.
The working yarn should come from your yarn ball.
Take your time here.
Hand position feels strange at first.
Then it stops feeling strange.
Step 4: Knit the First Stitch
Insert the right needle into the first loop on your left needle.
Wrap the working yarn around the right needle.
Pull the new loop through.
Then slide the old stitch off the left needle.
One stitch done.
Do it again.
Step 5: Knit Across the Row
Keep knitting until every stitch has moved from the left needle to the right.
You have now completed one row.
Probably not a perfect row.
That is fine.
Step 6: Turn Your Work
Move the needle holding the stitches back into your left hand.
Take the empty needle in your right hand.
Now start again.
Knit every stitch.
Step 7: Keep Knitting
Repeat the same action row after row.
That repetition builds garter stitch.
Your scarf will slowly get longer.
At first, progress may feel slow.
After a while, your hands start remembering the movement.
That is when knitting becomes far more relaxing.
Keep Counting Your Stitches
This tiny habit can save hours.
Suppose you started with 32 stitches.
Check now and then.
You should still have 32.
If you suddenly have 34, you may have accidentally added stitches.
If you have 30, you may have dropped one or worked two stitches together by mistake.
Catch these problems early.
They are much easier to fix.
Why Is My Scarf Getting Wider?
This happens constantly to new knitters.
You start with a neat edge.
Ten rows later, your scarf appears to be growing sideways.
Usually, extra stitches are being created.
One common cause is accidentally wrapping the yarn over the needle.
That creates a new loop.
Another happens near the first stitch of a row. If the yarn sits in the wrong position, the first stitch can look like two separate loops.
You knit both.
Now your stitch count grows.
Check your count every few rows while learning.
Why Is My Scarf Getting Narrower?
The reverse problem also happens.
You might drop stitches.
You might accidentally knit two stitches together.
You might fail to work the last stitch.
Again, count.
It sounds boring.
It works.
What Is a Dropped Stitch?
A dropped stitch happens when a loop slips off the needle and starts working its way down through previous rows.
You may notice a vertical ladder in the fabric.
Do not panic.
Stop knitting.
Secure the loose loop.
A crochet hook can pull the dropped loop back through each horizontal strand until it reaches the working row again.
Learning this one repair can save an entire project.
Should You Use Stockinette Stitch for a Scarf?
You can.
But understand what happens.
Stockinette stitch is made by knitting one row and purling the next when working flat.
It creates that classic smooth knitted surface with V-shaped stitches.
Looks nice.
But plain stockinette curls.
The side edges may roll inward.
The top and bottom can curl too.
That is not necessarily bad knitting.
It is how the fabric behaves.
If you want a flatter stockinette scarf, add a border.
Garter stitch works.
Seed stitch works too.
Ribbing can help.
Blocking alone may reduce the curl for a while, but plain stockinette usually wants to return to its natural shape.
Other Easy Scarf Stitches
Once knit stitch feels comfortable, you have many choices.
1×1 Rib Stitch
Alternate:
Knit 1, purl 1
Repeat across the row.
Ribbing stretches well and works nicely for winter scarves.
2×2 Rib Stitch
Repeat:
Knit 2, purl 2
It creates wider ribs.
A classic look.
Seed Stitch
Seed stitch mixes knit and purl stitches so the fabric forms small bumps.
It lies flat.
It is reversible too.
Great scarf material.
Moss Stitch
Moss stitch creates another textured fabric using knit and purl combinations.
It can give a scarf a clean handmade look without requiring advanced techniques.
Cable Stitch
Cables look more complicated.
They are usually tackled after you are comfortable with knit and purl stitches.
A cable scarf can look impressive, though it takes more attention.
Lace Stitch
Lace uses planned holes, yarn overs, increases, and decreases.
It creates lighter fabric.
Blocking becomes more important here because it helps open the lace pattern.
How Long Should You Knit the Scarf?
Keep going until you reach your chosen length.
Many adult scarves fall somewhere around 55 to 70 inches.
Some go longer.
Some stay shorter.
Try the scarf around your neck before ending it.
See how it hangs.
If you want to wrap it twice, you probably need extra length.
Do not rely only on a number.
Check the actual scarf.
How Much Yarn Do You Need?
Yarn needs vary.
A lot.
Scarf width changes the amount.
Length changes it.
Yarn thickness changes it too.
So does the stitch pattern.
As a broad starting point, many standard scarves may fall somewhere in these rough yardage ranges:
| Yarn Weight | Rough Scarf Estimate |
|---|---|
| Fine yarn | 300–500 yards |
| DK / light yarn | 275–400 yards |
| Worsted | 275–375 yards |
| Bulky | 250–350 yards |
| Super bulky | 200–250 yards |
| Jumbo | Around 175–200 yards |
Treat those as rough numbers.
A wide, heavily textured scarf may need much more.
Fringe also uses yarn.
Buying a little extra from the same dye lot can be smart.
How to Join a New Ball of Yarn
Running out of yarn halfway through?
Normal.
A full-size scarf often uses multiple balls.
A beginner-friendly method is to start the fresh yarn near the edge.
Leave a tail from the old yarn.
Leave another tail from the new yarn.
Keep knitting.
Later, weave both tails securely into the fabric.
Avoid tying a large hard knot.
That knot may sit awkwardly against the neck.
How to Add Stripes
Stripes are one of the easiest ways to change the look of a scarf.
Knit several rows with Color A.
Stop.
Start Color B.
Keep knitting.
Simple.
Wide stripes mean fewer yarn changes.
Thin stripes mean more ends unless you carry the unused yarn neatly along the side.
For a first striped scarf, wide blocks of color are easier.
How to Make Scarf Edges Look Better
Messy edges bother beginners.
Usually, they improve naturally with practice.
Still, a few habits help.
Do not yank the first stitch tight.
Keep your yarn tension steady.
Work the last stitch normally.
Check that the yarn sits in the correct position before beginning the next row.
Some knitters slip the first stitch of each row to create a chain-style edge.
That can look neat.
But you do not need it for your first scarf.
How to Bind Off a Scarf
Binding off closes the final row so the scarf does not unravel.
A standard method works like this:
Knit two stitches.
Use the left needle to lift the first stitch over the second.
One stitch remains on the right needle.
Knit another stitch.
Lift the previous stitch over it.
Keep repeating.
When one loop remains, cut the yarn and pull the tail through that loop.
Done.
Watch your tension.
A very tight bind-off can squeeze the final edge until it becomes narrower than the rest of the scarf.
Keep it relaxed.
Weave In the Ends
Do not just cut the yarn tails short.
They need to be secured.
Thread a tail onto a tapestry needle.
Weave it through several nearby stitches.
Change direction.
Work it neatly into the fabric.
Then trim the excess.
Repeat for every yarn tail.
This includes color-change tails and joins between yarn balls.
Should You Block a Knitted Scarf?
Often, yes.
Blocking can help the finished fabric settle.
It may smooth uneven stitches, straighten the shape, improve the drape, and open textured or lace patterns.
The exact blocking method depends on the fiber.
Wool and acrylic do not always react the same way.
Check the yarn care label.
For many natural-fiber scarves, gentle wet blocking works well.
Wash or soak the scarf as recommended.
Remove excess water without harsh wringing.
Lay it flat.
Shape it.
Let it dry.
How to Add Fringe
Fringe is optional.
But it can make a plain scarf look much more finished.
Cut yarn strands to the same length.
Fold a small group in half.
Use a crochet hook to pull the folded loop through the scarf edge.
Pull the loose ends through that loop.
Tighten gently.
Repeat across both ends.
After all fringe is attached, trim it evenly.
Do not trim each piece separately while attaching.
Your final line may become uneven.
Common Scarf Knitting Mistakes
Here is a quick troubleshooting chart.
| Problem | Possible Cause | What to Try |
|---|---|---|
| Scarf gets wider | Accidental extra stitches | Count stitches often |
| Scarf gets narrower | Dropped stitches or accidental decreases | Check each row |
| Holes appear | Accidental yarn overs | Undo or repair |
| Knitting feels stiff | Tension too tight | Relax your grip |
| Stitches look huge | Tension too loose | Keep yarn more controlled |
| Edges look messy | Uneven tension | Slow down at row ends |
| Stockinette curls | Natural fabric behavior | Add a flat border |
| Starting edge is narrow | Cast-on too tight | Cast on more loosely |
| Ending edge is narrow | Bind-off too tight | Bind off more loosely |
| Vertical ladder appears | Dropped stitch | Repair with crochet hook |
Mistakes happen.
Actually, they are part of learning.
Fixing one teaches you far more than knitting ten perfect rows without knowing why they worked.
Can You Knit a Scarf With Circular Needles?
Yes.
You can knit flat using circular needles.
Do not join the stitches.
Knit to the end of the row.
Turn.
Knit back.
Circular needles can be comfortable for wide scarves because the cable carries much of the fabric weight.
They also take up less horizontal space than long straight needles.
Can You Knit a Scarf Without Knowing Purl Stitch?
Absolutely.
A garter stitch scarf needs only knit stitches when worked flat.
That is why it makes such a good first project.
Learn the knit stitch first.
Get comfortable.
Then learn purl.
There is no need to learn everything on day one.
A Simple Beginner Scarf Pattern
Here is a clean starting pattern.
Materials
- Worsted-weight yarn
- Needles close to the size suggested on the yarn label
- Scissors
- Tapestry needle
- Measuring tape
Size
Aim for roughly:
7 inches wide × 60–70 inches long
Pattern
Cast on enough stitches to reach about 7 inches.
For many worsted yarns, this might be somewhere around 28 to 35 stitches, but your gauge decides the real number.
Row 1: Knit every stitch.
Row 2: Knit every stitch.
Repeat the same row until the scarf reaches your chosen length.
Bind off loosely.
Cut the yarn.
Weave in every loose end.
Block if the yarn allows it.
That is your scarf.
A Good Learning Order After Your First Scarf
Finished one?
Nice.
Try a slightly harder project next.
You could move through skills like this:
- Garter stitch scarf
- Striped garter scarf
- Ribbed scarf
- Seed stitch scarf
- Moss stitch scarf
- Cable scarf
- Lace scarf
- Brioche scarf
- Double-knit scarf
One new skill at a time.
That works better than trying six unfamiliar techniques in one project.
How to Care for a Hand-Knitted Scarf
Check the yarn label first.
Fiber care can differ a lot.
Some acrylic scarves can go into a washing machine.
Some wool needs gentle hand washing.
Some yarn may felt if exposed to heat and agitation.
After washing, laying the scarf flat can help it keep its shape.
Avoid hanging a heavy wet scarf.
The weight may stretch it.
Store wool scarves clean and dry.
Is Knitting a Scarf Good for Complete Beginners?
Yes.
A scarf removes many problems found in clothing patterns.
No body measurements.
No sleeves.
No neckline.
No shaping is required for a basic design.
You can concentrate on making stitches.
That repetition is valuable.
Your first rows might look rough.
Your tenth row may look better.
By row fifty, you start seeing real progress.
That is exactly why scarves work so well as beginner projects.
Final Thought
Learning how to knit a scarf does not require a huge skill set.
Start with decent yarn.
Pick needles that match it.
Cast on enough stitches for the width you want.
Then knit.
Row after row.
Simple garter stitch is enough to produce a real scarf, and along the way you will learn tension, stitch control, counting, fixing errors, joining yarn, binding off, and finishing.
Your first scarf may have an odd edge.
Maybe one section is tighter.
Maybe a stitch gets repaired halfway down.
Keep it.
Those small imperfections record the point where your hands were learning.
The next scarf will already be easier.
FAQs
How do you knit a scarf for beginners?
Cast on enough stitches for your desired width, then knit every stitch on every row. Continue until the scarf reaches the length you want, bind off, and weave in the loose ends.
What is the easiest stitch for a scarf?
Garter stitch is one of the easiest. When knitting flat, simply knit every row.
How many stitches should I cast on for a scarf?
It depends on yarn, needle size, gauge, and desired width. Multiply your stitches per inch by the width you want.
How wide should a beginner scarf be?
Around 6 to 9 inches works well for many standard adult scarves.
How long should a knitted scarf be?
Many adult scarves measure roughly 55 to 70 inches, though the length is your choice.
How much yarn do I need to knit a scarf?
A standard scarf may use roughly 200 to 500 yards depending on yarn weight, dimensions, gauge, and stitch pattern.
Can I knit a scarf with only one stitch?
Yes. A garter stitch scarf can be made using only the knit stitch when worked flat.
Why is my knitted scarf curling?
If you are using plain stockinette stitch, curling is normal. Add garter, seed, or ribbed borders if you want flatter edges.
Are straight or circular needles better for a scarf?
Both work. Straight needles are simple for narrow scarves. Circular needles can feel more comfortable for wider or heavier projects.
How long does it take to knit a scarf?
It depends on yarn thickness, scarf size, stitch pattern, and knitting speed. Chunky yarn and simple garter stitch usually work up faster than fine yarn or detailed patterns.